
PODS Photography Blog-July 2019 by Warren Capps
Organizing Your iPhone and iPad Photos
www.warrencapps.com
I am a big user of my iPad when I travel. I love to shoot and then review the daily take on my iPad. Generally, I create at least one photo album to store the trip’s photos. If I am shooting a lot, I may create an album for each day. At some point, the number of albums I had became so numerous that I started spending a lot of time just trying to find a particular album.
One of the things that always bugged me about organizing my photos on my iPhone or iPad was the flatness of the organizing structure. Many albums could be created, but they all were organized at the same level as Camera Roll. Then along came IOS 12.3. Apple introduced a new organizing structure, the folder. Now, an organizing structure with as much depth as you want now exists. You can create a folder and then place albums within the folder. And yes, you can create multiple layers such as Folder, Album, Folder, Album.
How do I start?
The feature is hidden a bit. If you go to Photos, Albums, and tap the + symbol in the top left corner, all you will see is New Album and Shared Album.

So, how do you find this new feature? Well, instead of tapping the + symbol, tap on See All, then Edit. Once again, you will see the + symbol. However, when you tap it, you will see new choices – New Album and New Folder.

Tap New Folder and the dialog box to name the folder will appear.

Now that you have a new folder, you can tap on it and create albums within it just as you would normally do by tapping Edit and then the + symbol. The cool thing is that you can create folders with albums or folders with albums that have a folder in it with albums in that folder ad infinitum, allowing you create as simple or complex a storage system as you want.

Shortcomings
Clearly this is version 1 of this feature, missing a lot of functionality.
My biggest issue is that there is no drag and drop of existing albums into a new folder or moving an album from one folder to another. If you want to move your photos into a new folder and album you will have to do the following steps:
1. Create the new folder
2. Create the album you want in that folder. You can use the same name at different levels.
3. Go to the old album. Select all the individual photos and add them to the new album in the new folder.
4. Delete the old album.
Another issue is that when you are importing photos and want to import them somewhere other than the Library (why it isn’t called Camera Roll is another one of those mysteries of life) the hierarchical structure is not visible. You see simply see a long list of albums whether or not they are in a folder.
Finally, no user- organized order of albums within a folder exists. Essentially they show up in the order you create them. Here is an example of where this could be a problem. Suppose I make a folder called US designed to contain an album for every state I visit. I take a drive from Austin to Washington DC, adding an album for each state that I photograph as I pass through. So, I have Texas, then Arkansas, Tennessee, Virginia, DC. First, they are not in alphabetical order which is what I might want because from DC I am heading to New England where I will a lot of states. Then I take my long awaited photo workshop in Alaska. It goes at the end of the list and there is nothing I can do about it. There is no logical order unless I create a folder first and enter every single state (in alphabetical order) whether or not I will ever get there.
So there you have it. A simple, useful, but mostly undocumented feature that I hope will be a great aid in organizing your photos on your iPad or iPhone.
PODS Photography Blog-May 2017 by Warren Capps
Planning for the Unexpected in Travel Photography
This will be a 3 part series of articles on travel photography. Article 1 will discuss what you hope to do with your photographs. Article 2 discusses how to physically prepare a travel photography journey. Article 3 will discuss preparation before the trip and how to be mentally ready for what comes your way during the trip.
What will you do with your photos after you get back?
I love travel photography. It is probably my most favorite passion, combining my love of seeing new places along with recording what I see with a camera. I have taken a couple of dozen photo workshops and tours. I have been to over 30 countries and 49 states (Hawaii is coming up this fall). Along the way, I have picked up a few practices that I think many would find useful. If not, in this day and age, I am sure you will let me know.
When I first started thinking of this topic, I thought I would simply talk about the physical and mental preparation that you might want to do to take outstanding photos during a trip. But the more I explored the topic, the more I realized that the last must be first. The very first question you must ask yourself is “What do I want to do with these photos when I get home?”. The answer to that question will greatly influence what you shoot and how/when you shoot it.
So, you have taken that great trip of a lifetime and have come home with 5000 photos. What are you going to do with them? For a friend of mine, the act of taking them seems to be enough. She almost never goes back and reviews the photos after a trip. She would also be the first to tell you that she is not a “real” photographer. But let’s suppose you want to share your photos. Let’s talk about how you might do that.
Are you an obsessive documenter? Do you want to be able to record all the documentary information about the photos you take? Trust me, it takes quite a bit of extra time to record what or who you photographed. It means that you will find yourself taking photos of signs as memory aids.
Many of our cameras still lack in-camera GPS, so if we don’t document, we might not even know where we took the photos. And oops, did you forget to set your camera’s clock to local time? This one is a biggie. Always set you camera to local time! And set it back when you get home. Otherwise, you might not have a good idea of when you shot the photo.
Another good reason to document is if you plan to return to the area or sell your photos as stock. I have a semi-professional friend that has been going to Oaxaca, Mexico for decades. She documents everything she shoots and brings back photo prints every year to the people she shot the year before. As a result, she has built strong relationships with the locals and gets invited to many events and homes that the standard tourist would never see.
Do you want to share your photos on social media and/or the internet? This is perhaps one of the most popular methods of sharing photography. Facebook, Instagram, Flickr, Snapchat, 500px, Photobucket, Smugmug, Google Photos, etc. all offer a number of ways to edit, store, display and share your photography, many at little or no cost. Do you have your own website, your own blog that you want to shoot and write for? If so, you may have an idea that needs illustrating.
Do you want to print your photos when you get home? I have lots of my photographs up on walls, mostly in my office. They sneak out in to other areas of the home when my wife isn’t looking. Some folks print out 4×6 photos simply so they can share them with family and friends that are not computer savvy.
Do you like to see you photos on mugs, create calendars of them, or make souvenir or coffee table books? One of my mom’s favorite gifts is a mug with my mug on it. Calendars are wonderful gifts at Christmas time that document your travels. I have one friend that loves to use Shutterfly to create a small book of her trips and another that produces a pretty good size coffee table book of his travels.
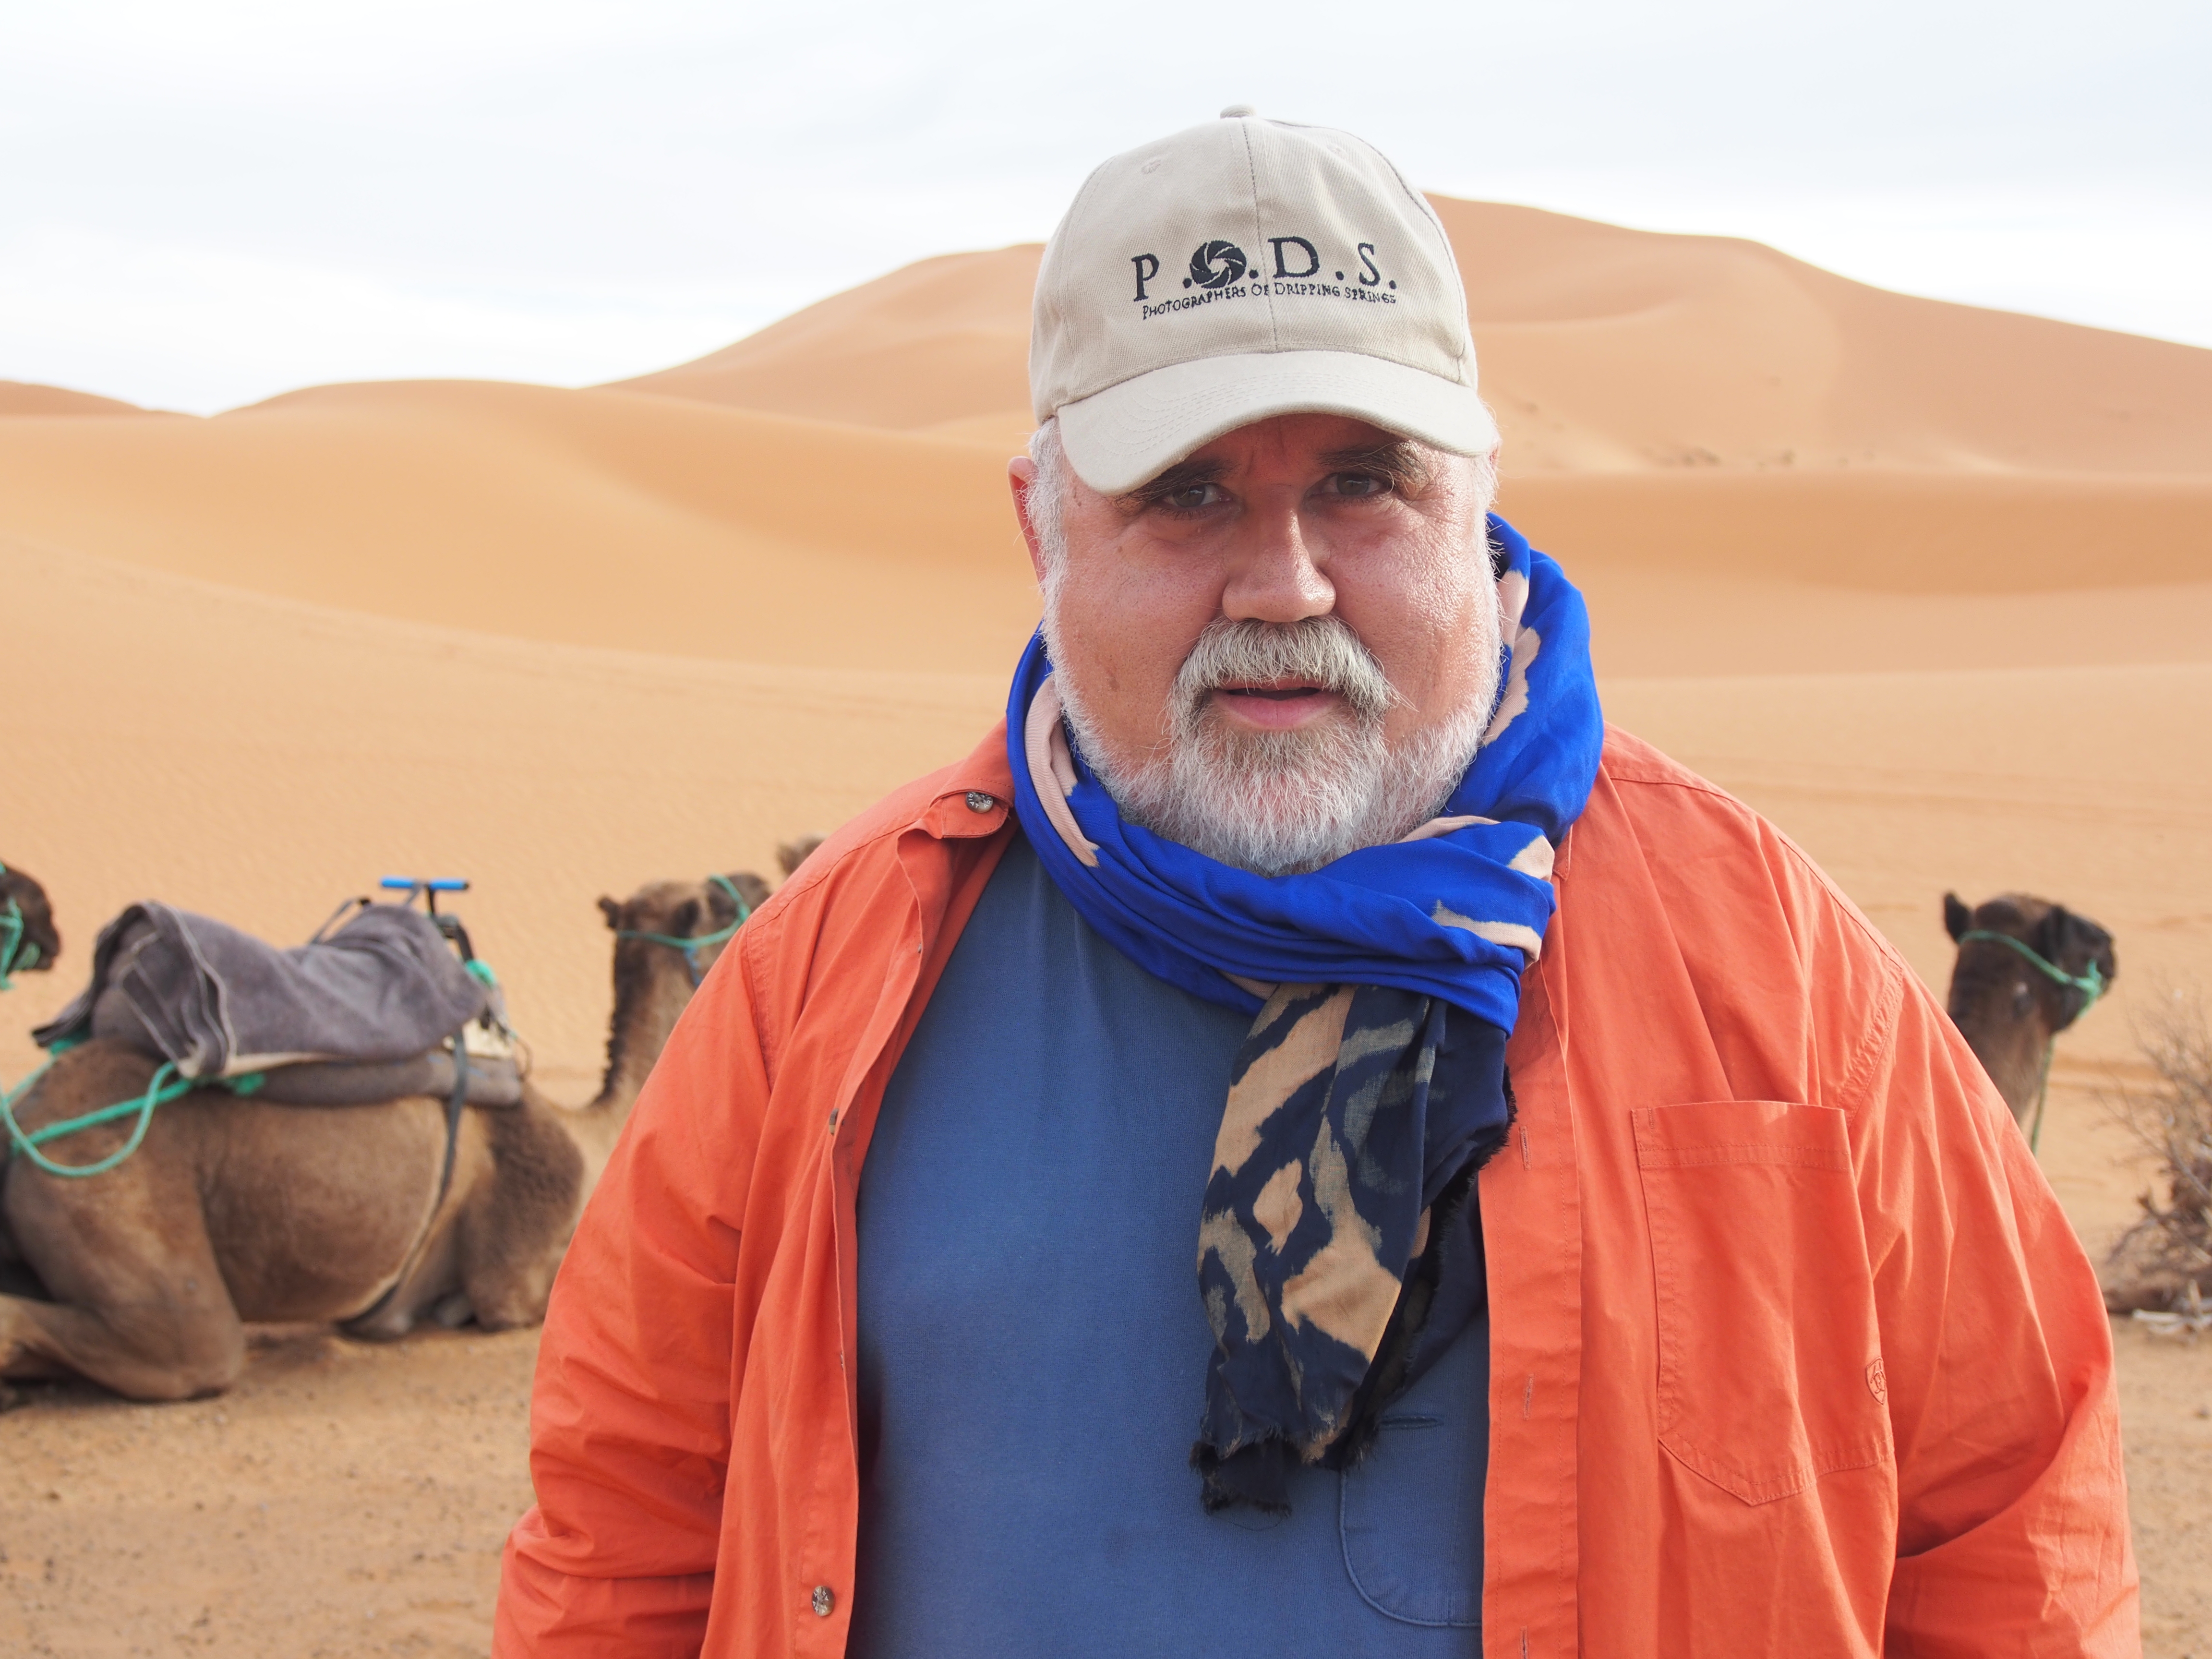
Do you like to assemble your photos into a video, creating a travelogue of you trip? Lightroom, Photodex, and other software offer great capabilities in creating slide shows complete with text, transitions, and music. You can post the resulting videos on Facebook, your own website or send them to your friends as DVDs. Here is a simple example of a trip to Morocco:
And here is a little secret. Photos used in slide shows do not need to be perfect. Many times, a photo is on the screen for only a second or two. It really doesn’t have to be perfectly in focus or perfectly exposed. When creating a slide show, you are building emotional content.
Do you want to enter your photographs in contests? Contests are a great way to measure your skills against others. However, be very careful and understand the rules. In some cases, you will be giving away all rights to your photos.
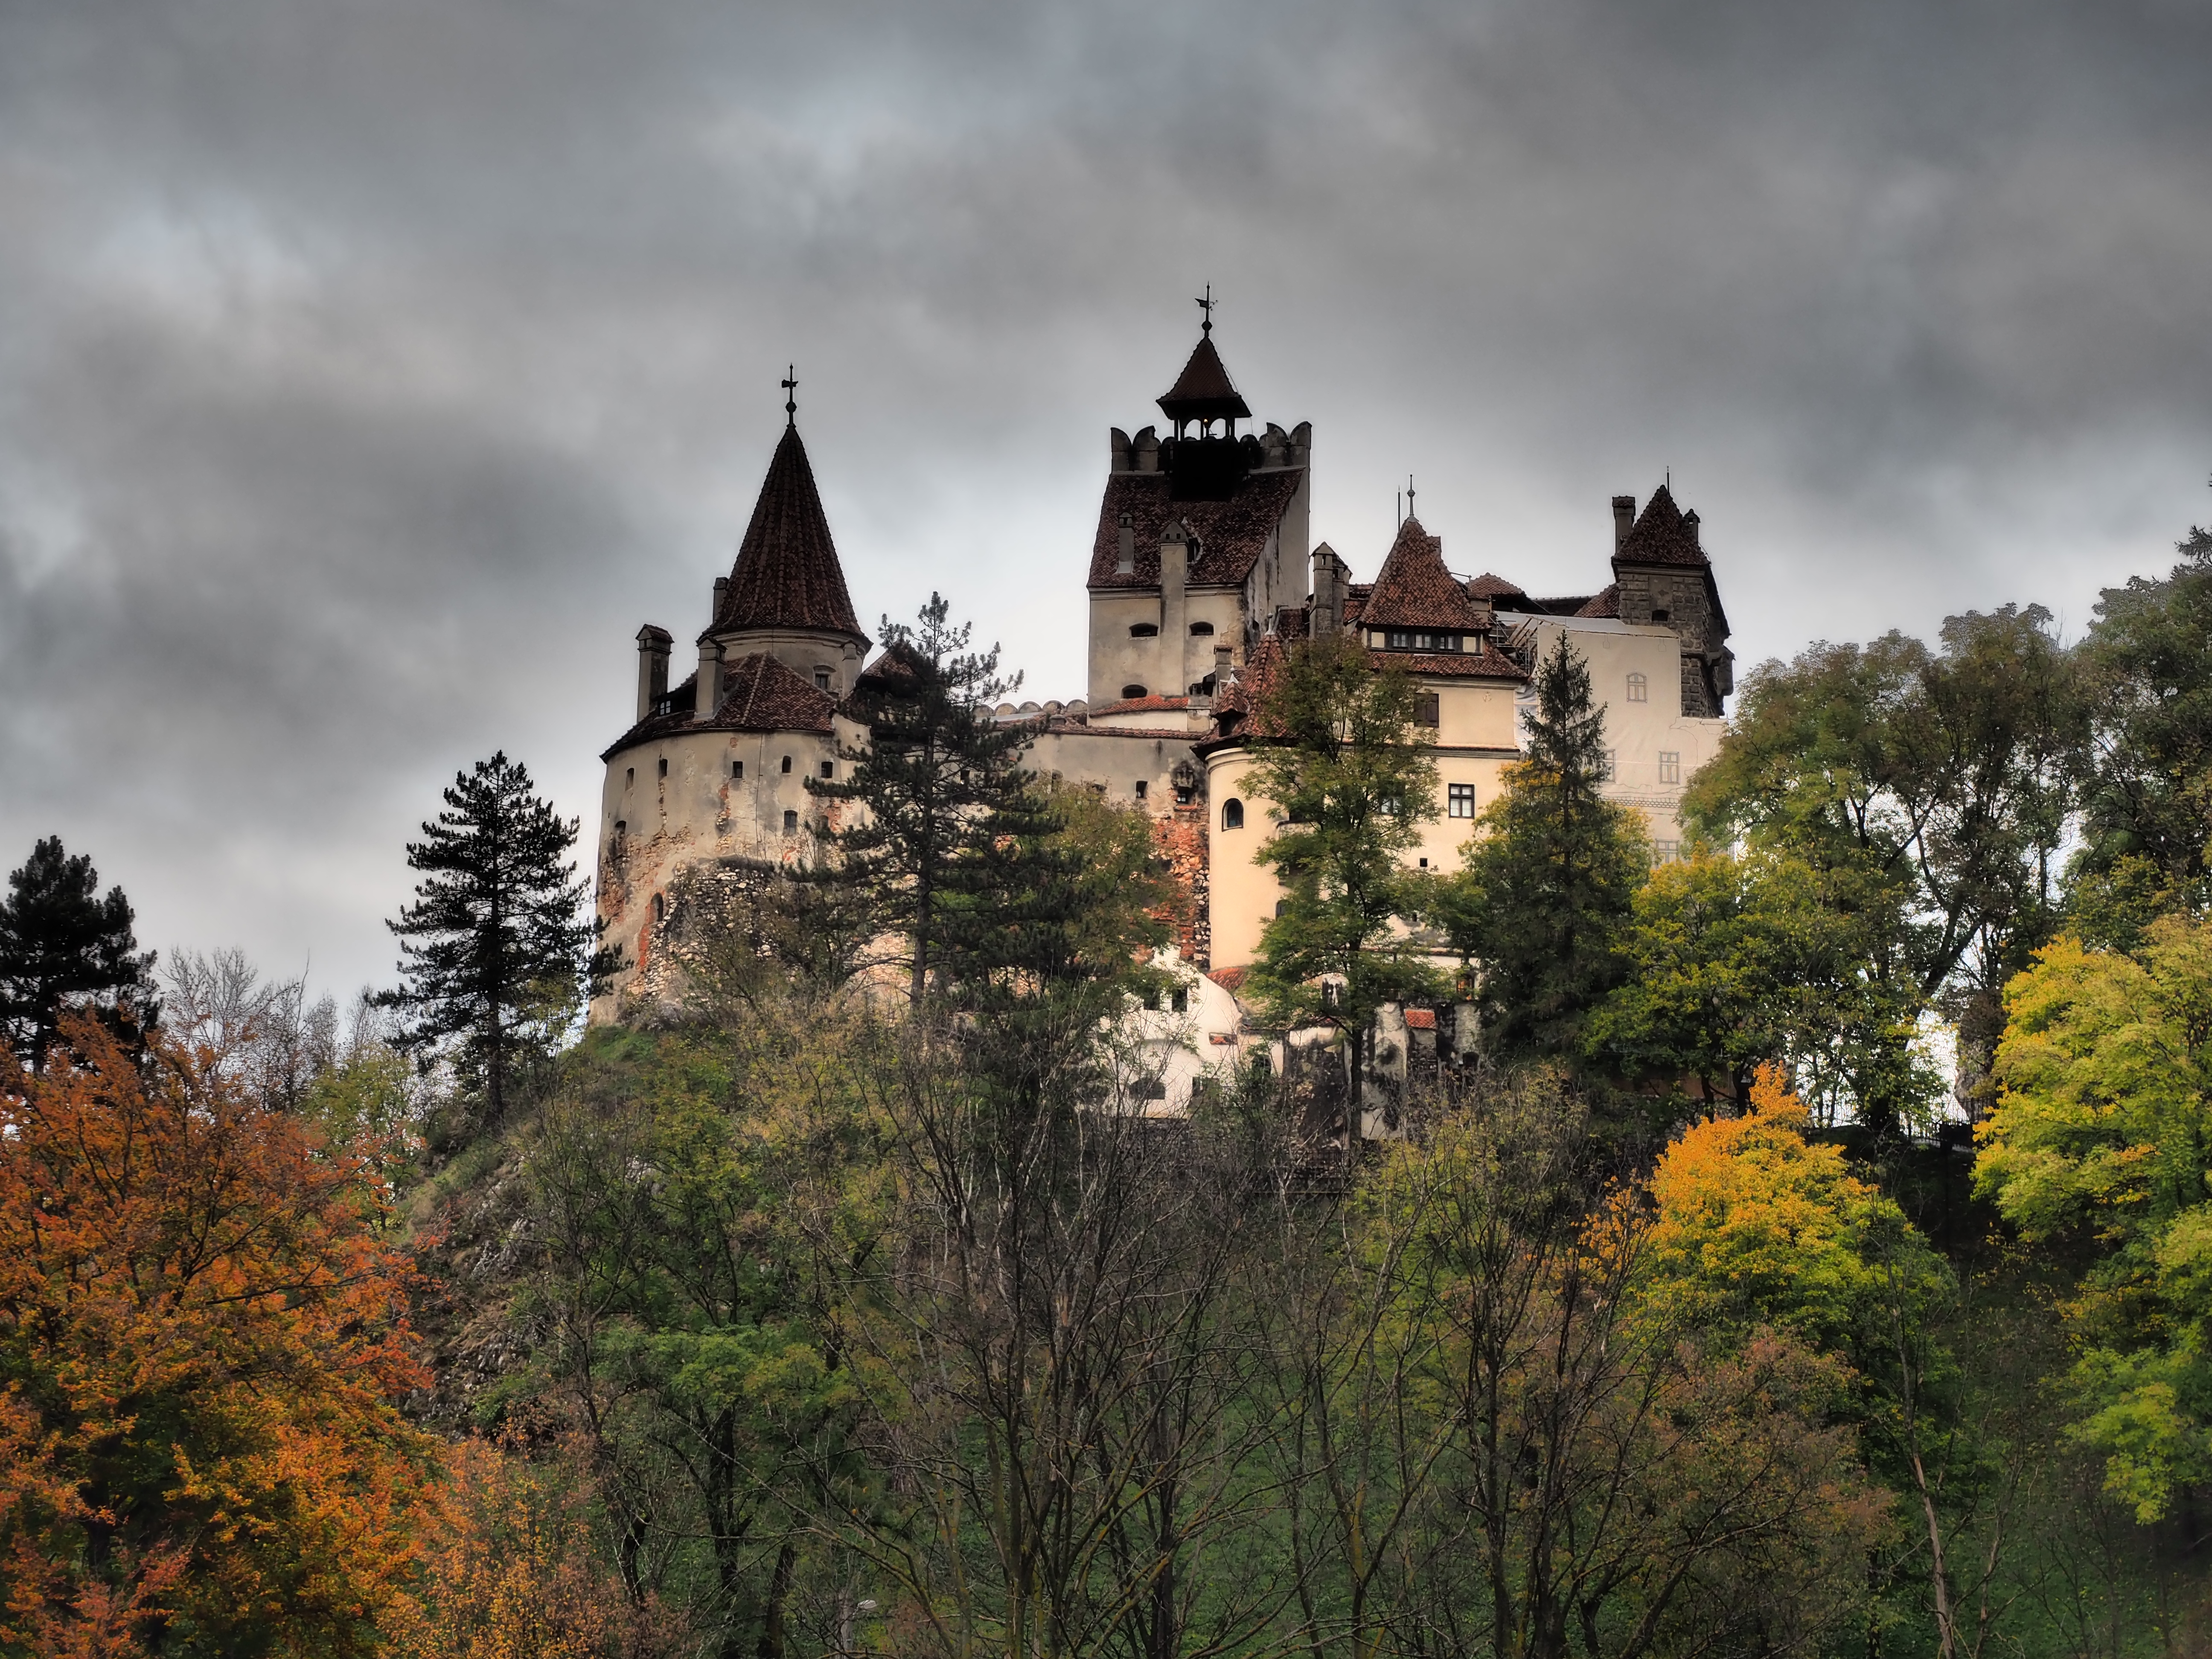
Do you want to list your photos on stock sights for sale? Adobe Stock and Shutter Stock are a couple of sites that come to mind. This is a nice way to make back a little bit of money to finance your next photography purchase. Again, I have a friend that has sold a photo of Bran Castle (Dracula’s Castle) in Romania a couple of hundred times. Granted, she gets only a quarter every time she sells it, but it does add up. However, understand two things. These sites want very solid documentation of what you shot (think keyword searches) and if you have people in them, they may want model releases.
Your choices of what you want to do with your photography will influence what you shoot and what you keep. For example, everybody loves a picture of themselves. You might concentrate on taking photos of your companions so that you can share them in myriad ways. I have been on photo tours where a grandfather took a favorite doll of a grandchild and photographed in every location we visited. A sweet way to document the trip and maybe instill a love of travel into a child.
Whatever you do, enjoy what you are doing. Travel is a way of opening up, learning new cultures, and communicating in new ways. Many times a camera can a means to starting a dialog with someone. If you are like me, it is easy to become addicted.
PODS Blogger Warren Capps:
PODS Photography Blog – April 2017 by John Fierstien
A Brief Introduction to GIMP – from John Fierstien
Authors note: this is the first of what I hope will be a series of articles on GIMP. I plan to take you through a journey-of-tasks roadmap of how to do various things in GIMP. Along the way you will learn it and discover its power. A hobby like photography should be fun, not a money-pit. There are always things to buy like lenses, lights and tripods. Why spend money on software when there are options that are free? If a friend gave you a high quality lens for free, you would thank that friend and then learn how to use it properly. I hope you take advantage of this gift offered by the photography community. Welcome to GIMP!
GIMP (stands for GNU Image Manipulation Package) is a free and OpenSource photo Editing package. It runs on Windows, MacOS and Linux. If you are looking for something that is an option to PhotoShop then GIMP should be your first stop.
“Free software? No way! I’ve used free software before and it is buggy, hard to use and never works right – you get what you pay for”. Well maybe, but GIMP is different. GIMP has been around for at least 20 years and and is fully supported by a group of dedicated programmers/photographers/graphic artists that want an alternative to commercially available packages.
“So why have I never heard about GIMP”? GIMP doesn’t have a fancy marketing department, they don’t have a sales department and they don’t go to trade shows and conferences. The only way you are going to hear about GIMP is by word of mouth and by reading photo blogs.
Installing GIMP is trivial – go to gimp.org and choose the package for your operating system, and install it like any other package. If you are running Linux you can skip all the above and simply select it from you package manager or software center and install it. Once you have it installed on your operating system, open it as you normally would any other software package.
GIMP will start up in one of 2 modes – single window or multi-window. You can run GIMP as a contained single window or as multiple windows. I like running in multi-window mode because there are separate windows for the toolbox, the layer manager and the main window. I can move these windows where I want on my dual screen system. Other users like having them together in an easy to reach place and like single window mode. No matter what you prefer, moving between modes is simple. Go to Windows / Single-window Mode and either click it on or off.
The next thing you will want to do is set some preferences. There are 3 main sections (or windows) to GIMP, the main window, the layer manager and the toolbox. The first thing you will want to change is the toolbox preferences. Go to Edit / Preferences and scroll down to the Toolbox preferences. This where you can set what you want visible in the toolbox. Don’t worry about switching things off because most things are available in the pull down menus. That being said, it is a good idea to keep the “Show Foreground / Background Color” on. I would recommend that you keep most things on until you are familiar enough with GIMP to know you will not be using them. Then come in here and click them off. The defaults are usually very good and there is probably no need to change things right away – but eventually you will want to and this is where you go.
Then next thing you might want to do is download some of the hundreds of plugins that people have written for GIMP. You might start with ufraw, which is a utility that handles raw images from the most popular camera vendors. Try the gimp.org to website to see if there is a package for the pre-assembled plugins that might exist that will contain dozens of plugins in one. It will save you time and effort.
Your screen will probably look something like my screen below. If you are in single window mode it will look slightly different – pushing the 3 windows into a single window and 3 frames. The toolbox is on the left with the selections on the top and the parameters on the bottom changing for whatever tool you select at the top. The window on the right I use mostly for the layer manager. If you have never used a layer manager, don’t worry. I’ll explain it in future blogs but for now all you need to know is where it is. It is an amazingly powerful tool well worth the time and effort to learn.

OK, you have installed GIMP and now is the time to try a few things. You can work with a raw image, but to keep things simple I recommend this first time that you work with a jpeg (or jpg). There are at least 2 different ways to open a file in GIMP. 1 – go to File / Open and select the image you want to work on and press OK. Or simply open your system file manager and drag and drop the file onto the main window in the middle that is now blank.
Go ahead and select any image and open it in GIMP.
There are usually at least 2 ways of doing anything in GIMP. A lot of things are available in the toolbox and everything is available in the menus at the top of the screen. I recommend using the toolbox when you can until you are very familiar with it. It will save you countless keystrokes and time trying to find things in the file menus.
Crop
One of the things you will do frequently is crop your image. Select the crop tool from the toolbox and your screen cursor will turn into a plus sign. You’ll notice some options below the toolbox have changed and you now have the option of keeping a fixed aspect ratio, cropping only this layer (more on this in another blog) and a few others. This would be the time to make any of those selections. When you are ready, move the cursor over the photo where you want to start the crop, hold the mouse button down and drag it to the other side and let up. Don’t worry about getting it perfect because you have an opportunity to make changes before it crops. There are now handles on the inside of the proposed crop that allow you to move or adjust the crop in any direction simply by dragging the handle in the desired direction. If you want a bit more control you can put the cursor inside a handle and use the arrow keys for a finer control. When you have everything perfect, simply press the enter key and the system will crop the image.
OOPS – not exactly what you want? Go to Edit / Undo Crop and the system will back up one step and undo your crop. You can actually set the number of steps the system will remember and you can undo. Undo history is set in Preferences / Environment – I have mine set to 30 but you can also restrict it for memory size available so you don’t consume memory resources that you might never use. History is also available in one of the tabs in the layers window.
Brightness and contrast
The other thing you might want to do is adjust the brightness or contrast of your photo. There are a couple of ways of doing this. I’ll discuss my favorite way and then briefly mention other ways. The curves tool is a single interface that allows the photo editor to make a lot of changes with just a couple of mouse clicks. The interface (shown below) shows the picture’s black to white distribution in the gray graph. The graph shows there are a lot of dark areas of the picture but at the black end there is nothing. In the middle of the plot there is a single straight black line that goes from the lower left to the upper right side of the plot.
The line represents a function that controls the shade of gray of the original picture (bottom axis) to the output of the gray you see in your picture (left axis). By pushing the line lower at the darker end, you are making the darker part of the picture even darker. By pushing the line higher at the lighter end of the picture you are making the lighter parts even lighter. The net result is you are increasing the contrast of the picture. The second photo below shows an adjustment with an increase in contrast.
Moving the line in the opposite directions reduces the contrast of the picture. The curves tool also allows you to adjust the red, green and blue components of the photo individually and thus you have an almost infinite control of the photo.
Grabbing the line moves it and places a handle on the line for additional adjustment. If you want to remove a handle, simply pick it up and drag it right or left off the graph.


If the curves tool seems a bit too complex, changing the brightness and contrast is also available under Colors / Brightness and Contrast. It doesn’t provide all the power of the curves tool but it is simple and easy to use.
OK, now it’s time to save your photo. I encourage you to get in the habit of saving your photo in GIMP’s xcf format. It preserves your layers (we’ll talk about those in a future blog) and history, which can save you huge amounts of time if you ever need to go back and re-edit a photo. Also many other packages support xcf formats, so if you use other packages you might want to check the compatibility of xcf.
Go to File / Save As and the save window will pop up. The xcf file type is filled in as the extension and the file name will probably be the name of the jpeg of your original file. Check the directory where the file is going to be saved and press the Save button.